Thursday, February 12, 2015

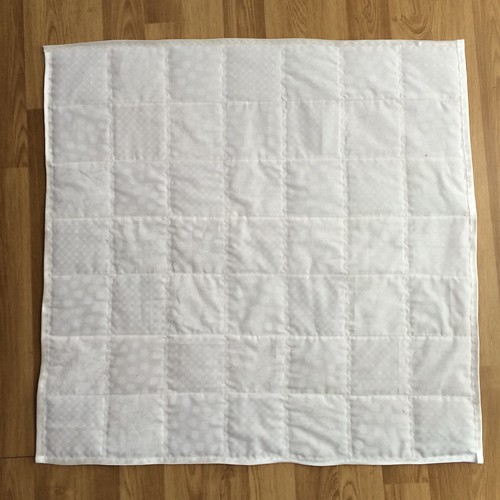
Finally finished!

Looking back at my last post, that was 1st October. Where I first stated that I started this quilt... Yes, so long ago, yet it's not a big quilt. A quilt for a baby!

Well, the number one reason for the long slow progress has been that I am now pregnant :) and have had pregnancy fatigue constantly since then! Yes, I don't tell a lie, the tiredness has been inconvenient... But on the other hand it's been sweet paradise to have so many early nights and fulfilled sleep! Bliss! 

Even though I'm expecting (a girl due in June) ... This sweet baby blanket has been in work for some close friends who are expecting their first child next month. (Also a girl) 

Here are the stages that have taken place since my last post. 
I am working on a quilt, a baby quilt.
 
Each pinwheel block consists of 4 smaller blocks sewn together. So I had to account for seam allowance from the smallest block. 
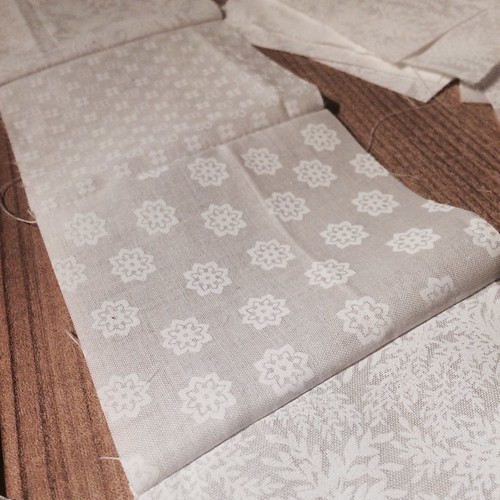
I needed for each full pinwheel block, 4 solid whites and 4 patterned.
 
Cutting - … urgh! What felt like millions! (in reality was only 280) 
I'm still trying to channel the “happy place” where quilters go to get into the rhythm of cutting and cutting and cutting. If such a place exists. 
 
Then it was to pin the little blighters to make the quarter of each pinwheel. 
Now I could see it coming together … ;D


Then – was to sew the little pinwheels into actual pinwheels.
 

Think about the centre points here for a minute. You've got folded on folded pieces of fabric. My sewing machine definitely needed a new needle before starting this project (and probably also needs one again now) We got there in the end. After a few tough points when making these little pinwheels. Happy to report no dropped stitches or broken needles though!
 
Then the point was to make it random (easier said than done) 


Excuse all the bad pictures – you can tell I've been working on it in the evening times in different rooms in the house, with multitude of lighting effects and silly Instagram filters. 
 
 Then, to sew the blocks together


I caved and went to the local haberdashery to search for fabric for the reverse, which truth is - one of my favourite places, it's just a place I can spend money in VERY easily! It's easier to go whe I have a definite project in mind, otherwise I just buy everything!

So, reverse side material bought. From the same material collection, but in a colour that was not in the mix on the front of the quilt.

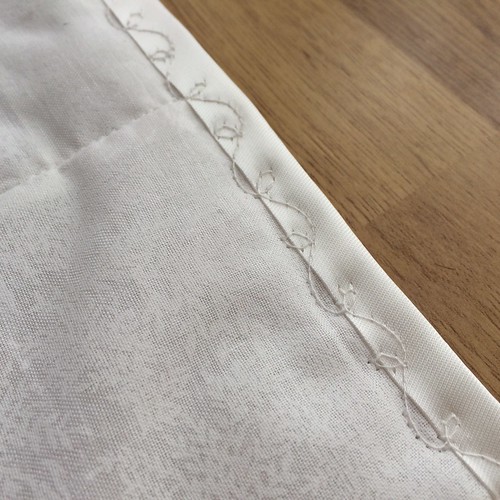
The lady recommended a border as well, I had not thought about adding a border other than the binding, but when she folded it over to show me, it instantly gave it a "finished" feel. Looked great! Great idea.


Once the border was added, I realized that I did not want a binding. I searched online for hints and tips to do the "pillowcase method" and found a great tutorial from red pepper quilts. 


And here - finally ... 4.5 months later... 


Wednesday, October 1, 2014

I've made a start...

I've made a start on another baby quilt. I'm finding it so hard to resist fabrics at the moment, as for the first time in forever I want to stash stash stash! Normally with other crafts I try to buy stuff project by project - otherwise I'll end up with an overloaded stash like I did with beads. But this time, stashing fabric feels SO RIGHT! yeah baby!

I really love patchwork, and I have seen loads of blocks that I want to do. For now however, I'll be practicing my squares patchwork aligning with lush little off cuts or small patchwork packets. 

I've been cutting tonight, whilst watching "Prison break" for the 3rd time. There's not much on tv in the evenings at the moment so I've hit the DVD collection.

so, squares are cut. Actually - that's a lie. SOME of the squares are cut. I still need to do lots more white and I want to go shopping for a solid colour to add in, maybe a pink. 

What do you think?


Hopefully I'll continue to make progress on it over thus upcoming bank holiday weekend. 

Love to you all
x 

My lesson learnt today: ALWAYS HAVE SPARE ROTARY CUTTER BLADES. (Yes, I need to buy some blades ASAP too!)
  

Sunday, August 31, 2014

My first quilt!

Hey Everyone! Please excuse me if you have seen this already (I posted it to my facebook feed earlier today and have already received some lovely comments :) )


I finished my first quilt! :D hoorah!
What a lesson it's been. I did try, I tried my hardest!

I had 3 lovely fat quarters that I picked up in Detroit earlier this year. I picked them up on a whim, they were pretty and complimentary. After seeing a few people start their quilting 'career' I knew that pointing corners together could be a pain in the neck, and that subtle colours - or similar colours would be more forgiving in the final pattern, so I picked these out as an ideal choice.
Cut into many squares 10x10cms
and then started making strips, measuring and sewing.


Then I sewed the strips together. I had hoped that measuring precisely in the strips would ten work out with alignment when joining the strips together - but, by millimetres some missed the point.


I got advice and researched about batting. But since I only have a standard sewing machine - I got a thin middle layer to be sure that it'd go under the needle and not stress me out  :P
I backed it with standard white cotton, and quilted straight lines 'in the ditch' in the directed that I had actually managed to sew a straight line, and then I used a decorative stitch to quilt in the other direction to cover slightly those misaligned corner points. sneaky me.
 

I had some silky bias tape in my stash already - and by sheer luck I had enough in! so, finally it was edged with this and again my favourite decorative stitch.


It's got a million imperfection and yes, I know its a baby blanket, and yes, it's white - not ideal. But after receiving a quilt for my son when he was born (brought to me by the members of craftpimp) I knew that quilts can be, will be heirlooms. This is what I wanted for this. A summer, light baby quilt. One to keep. Shame its got so many imperfections!

So now, I'll launder it and then it shall be gifted somewhere.
Probably to someone who appreciates handmade things and will embrace those little mistakes and slipped stitches as little quirks.

Hope you like it too!

Thursday, August 14, 2014

Its good to finish a project :)

I have had a few little projects on the go recently, a crochet basketweave infinity scarf (which is actually already finished but not yet blocked), a quilt top - which still requires a batting and a bottom, and the minion mitts. It's the mitts that are finished! Hoorah!


Link to my Ravelry project page - HERE
Link to the original blog with original tutorial - TampaBayCrochet - HERE

Hope you like them! x

Monday, July 14, 2014

Staying creative


This week, I reminded myself that I don't necessarily need hours and hours of time to make something cute and simple. 

The challenge that I have at the moment is to have time + motivation + creative mojo all at the same time. This bag however, was created without a plan. 

Off cut of upholstery fabric from ikea (from the bargain bucket) and an hour of my time. 

I didn't really measure anything either - this is for me, so I'm willing to have a bit of wonkiness. It didn't turn out wonky though! 

Little tote bag, suitable for me and my everyday needs :)

Monday, May 5, 2014

Cloudy Day - Beginners Crochet Baby Blanket

I finally finished this baby blanket!

 
TUTORIAL - on how to make a granny square
TUTORIAL - on how to join granny squares
INSPIRATION - on how I edged the blanket
(all external links are tried and trusted by me)

I started it way back in November last year, and it was always the plan that it was going to be plain blue with white clouds. In January I had finished the main blue blanket and was struggling to successfully make clouds that I liked. I tried many ways to crochet the clouds initially, and even though they ended up being correct and looking like they were meant to, I just was not happy with them. So, because of this, the blanket lost momentum and I had to put it away.

This past week, I eventually got round to thinking about this again - needing a newborn present for my new 2nd cousin Ben, it would be perfect! All that was missing was the clouds. Kicking myself up the rear, I went to a local fabric shop and bought an offcut of lovely soft fleece. Lucky that it was there as an offcut, as I knew I had to be really fussy about it. It could not fray or lose fluff at the cut edges. (a lesson I learnt the hard way recently with another fabric)

After cutting the clouds into curvy soft cartoon-y shapes. They were hand sewn on in the evenings.
Now, finsihed, freahly wahsed and ready to be packed to be sent to Ben.

I hope that you like it too! ♥

Wednesday, February 19, 2014

The start of my 3D Mosaic Flower - Part 1 of 4

I've had a project stuck in my head for what seems like ages now. At least 6 months I'd say. Inspired by this "PIN" on pinterest [follow me here] I saw this amazing 3D mosaic flower that was truly inspiring. Inspiring so much so that I had to make something 3D and mosaic, (jump in to the deep end why not?!) Previously mosaic projects had never really inspired me. I'd never really looked at mosaic projects and thought "Yeah I wanna have a go" but this one got me daydreaming about making one of my own.

The mosaic experience I have is watching the husbeast tile the mosaic backsplash in the kitchen, or I'm sure I must have done it as an activity as a child, but I cannot think if I have done so or not! So - trust me, I'm no expert!

I'd imagine you learn to mosaic by doing nice flat things - trays and mirror frames, I have even thought about starting on a more simple project like that before attempting the flower to get used to working with the putty and playing with mosaic tiles - pfft, I dont know if I can be bothered with that! I just wanna get stuck in, learn by doing (learn by making a million mistakes - probably) and not starting with those simple projects - afterall - the 3D sculpture part of it is what has drawn me like a moth to a flame.

Hmmm ... Supplies ... Well, I haven't yet got everything - but I have enough to START.
• Alu-mesh (I got it from the DIY store about 4 months ago!)
• Plaster of Paris (Bought from Ebay about 6 months ago!)

So, husbeast went out to the pub last night - and once the baby was in bed, I went down to the hobby room, whilst watching a few of my favourite programs made a start on building the mesh.

I'm thinking tulip ... so, I cut out large petal shapes from my alu-mesh. Free-hand cutting.


I then attached them together by using craft wire. I used the wire as you would needle and thread, weaving in and out making look like a sewn seam. It does not have to be neat, it will be covered eventually.


Note: once you've cut the mesh - my god it can get prickly! Scratches, pricks, prods and pokes - I think I should have attempted it wearing long sleeves because my arms were itchy from all the contact with the cut edges, luckily no blood! Afterwards, I soothed my arms after I'd finished by putting antiseptic cream on! - so next time I do this, I'll be working with long sleeves for this part for sure!

 
I also added a mesh base, attached with the craft wire - and it started to look like princess lillifee's crown rather than the bulbus tulip shape that I want. So with more wire, I pinched the petals a little further up ...

 
Looking much better! I wish I could take better photographs of this stuff. It's a nightmare!

Next step will be to cast it in the plaster - the messy bit! I'm not a big fan of playing with messy sloppy stuff ... but it has to be done! I'm looking forward to having it cast into it's shape.

So, to be continued SOON! I'll probably find the time one evening this week to continue :)