Thursday, March 19, 2015

Next WIP - Dino Quilt

Well, I'm back at my sewing machine again!

Man I love it. I wish I had more time to be there. After a full days work and then relaxing at home, by the time I'm really and relaxed and the little ones in bed, by pregnant hormonal self wants to climb early into bed too (and on some nights I do just that!)

I have managed to finish my next quilt top.
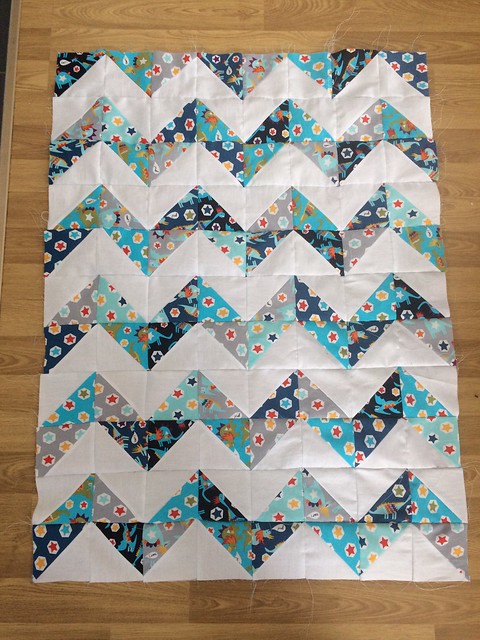
Using cute DINO PUNK material, I started on my first HST quilt.

All sewn together. I wish I had enough to do one more line across the top to finish the chevron :( but nope, this'll have to do. I'm thinking of constructing it like my last one, with a border and then without binding.

I do wish I had enough material patches to complete one more row along the top. But it'll have to do.
Next will be to find a cute backing material for the reverse side and then i'll start the quilting process.

Hope you like it :)

x

Thursday, February 12, 2015

Finally finished!

Looking back at my last post, that was 1st October. Where I first stated that I started this quilt... Yes, so long ago, yet it's not a big quilt. A quilt for a baby!

Well, the number one reason for the long slow progress has been that I am now pregnant :) and have had pregnancy fatigue constantly since then! Yes, I don't tell a lie, the tiredness has been inconvenient... But on the other hand it's been sweet paradise to have so many early nights and fulfilled sleep! Bliss! 

Even though I'm expecting (a girl due in June) ... This sweet baby blanket has been in work for some close friends who are expecting their first child next month. (Also a girl) 

Here are the stages that have taken place since my last post. 
I am working on a quilt, a baby quilt.
 
Each pinwheel block consists of 4 smaller blocks sewn together. So I had to account for seam allowance from the smallest block. 
I needed for each full pinwheel block, 4 solid whites and 4 patterned.
 
Cutting - … urgh! What felt like millions! (in reality was only 280) 
I'm still trying to channel the “happy place” where quilters go to get into the rhythm of cutting and cutting and cutting. If such a place exists. 
 
Then it was to pin the little blighters to make the quarter of each pinwheel. 
Now I could see it coming together … ;D


Then – was to sew the little pinwheels into actual pinwheels.
 

Think about the centre points here for a minute. You've got folded on folded pieces of fabric. My sewing machine definitely needed a new needle before starting this project (and probably also needs one again now) We got there in the end. After a few tough points when making these little pinwheels. Happy to report no dropped stitches or broken needles though!
 
Then the point was to make it random (easier said than done) 


Excuse all the bad pictures – you can tell I've been working on it in the evening times in different rooms in the house, with multitude of lighting effects and silly Instagram filters. 
 
 Then, to sew the blocks together


I caved and went to the local haberdashery to search for fabric for the reverse, which truth is - one of my favourite places, it's just a place I can spend money in VERY easily! It's easier to go whe I have a definite project in mind, otherwise I just buy everything!

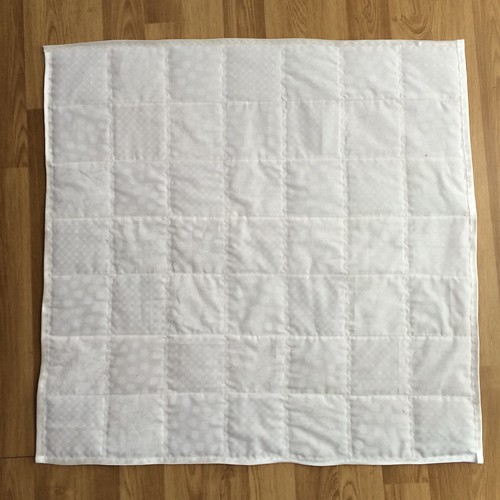
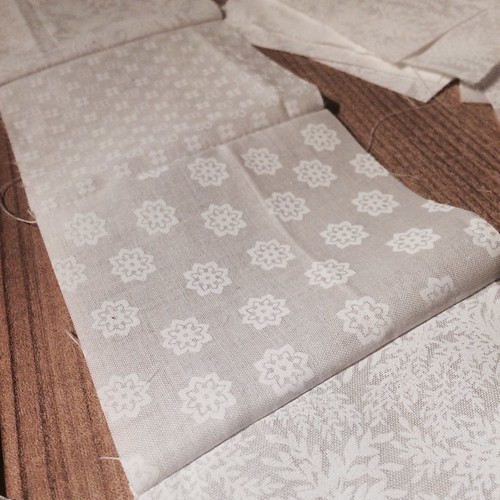
So, reverse side material bought. From the same material collection, but in a colour that was not in the mix on the front of the quilt.

The lady recommended a border as well, I had not thought about adding a border other than the binding, but when she folded it over to show me, it instantly gave it a "finished" feel. Looked great! Great idea.


Once the border was added, I realized that I did not want a binding. I searched online for hints and tips to do the "pillowcase method" and found a great tutorial from red pepper quilts. 


And here - finally ... 4.5 months later... 


Wednesday, October 1, 2014

I've made a start...

I've made a start on another baby quilt. I'm finding it so hard to resist fabrics at the moment, as for the first time in forever I want to stash stash stash! Normally with other crafts I try to buy stuff project by project - otherwise I'll end up with an overloaded stash like I did with beads. But this time, stashing fabric feels SO RIGHT! yeah baby!

I really love patchwork, and I have seen loads of blocks that I want to do. For now however, I'll be practicing my squares patchwork aligning with lush little off cuts or small patchwork packets. 

I've been cutting tonight, whilst watching "Prison break" for the 3rd time. There's not much on tv in the evenings at the moment so I've hit the DVD collection.

so, squares are cut. Actually - that's a lie. SOME of the squares are cut. I still need to do lots more white and I want to go shopping for a solid colour to add in, maybe a pink. 

What do you think?


Hopefully I'll continue to make progress on it over thus upcoming bank holiday weekend. 

Love to you all

My lesson learnt today: ALWAYS HAVE SPARE ROTARY CUTTER BLADES. (Yes, I need to buy some blades ASAP too!)
  

Sunday, August 31, 2014

My first quilt!

Hey Everyone! Please excuse me if you have seen this already (I posted it to my facebook feed earlier today and have already received some lovely comments :) )


I finished my first quilt! :D hoorah!
What a lesson it's been. I did try, I tried my hardest!

I had 3 lovely fat quarters that I picked up in Detroit earlier this year. I picked them up on a whim, they were pretty and complimentary. After seeing a few people start their quilting 'career' I knew that pointing corners together could be a pain in the neck, and that subtle colours - or similar colours would be more forgiving in the final pattern, so I picked these out as an ideal choice.
Cut into many squares 10x10cms
and then started making strips, measuring and sewing.


Then I sewed the strips together. I had hoped that measuring precisely in the strips would ten work out with alignment when joining the strips together - but, by millimetres some missed the point.


I got advice and researched about batting. But since I only have a standard sewing machine - I got a thin middle layer to be sure that it'd go under the needle and not stress me out  :P
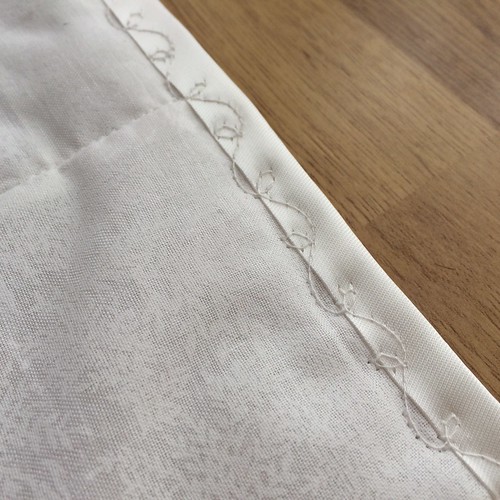
I backed it with standard white cotton, and quilted straight lines 'in the ditch' in the directed that I had actually managed to sew a straight line, and then I used a decorative stitch to quilt in the other direction to cover slightly those misaligned corner points. sneaky me.
 

I had some silky bias tape in my stash already - and by sheer luck I had enough in! so, finally it was edged with this and again my favourite decorative stitch.


It's got a million imperfection and yes, I know its a baby blanket, and yes, it's white - not ideal. But after receiving a quilt for my son when he was born (brought to me by the members of craftpimp) I knew that quilts can be, will be heirlooms. This is what I wanted for this. A summer, light baby quilt. One to keep. Shame its got so many imperfections!

So now, I'll launder it and then it shall be gifted somewhere.
Probably to someone who appreciates handmade things and will embrace those little mistakes and slipped stitches as little quirks.

Hope you like it too!

Thursday, August 14, 2014

Its good to finish a project :)

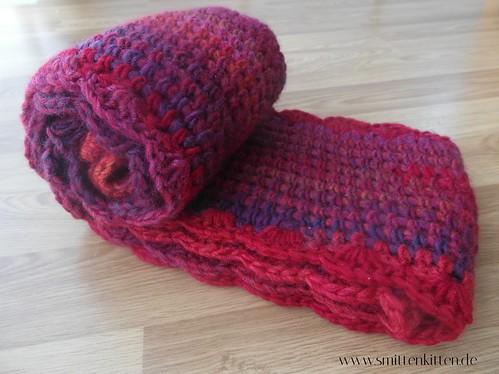
I have had a few little projects on the go recently, a crochet basketweave infinity scarf (which is actually already finished but not yet blocked), a quilt top - which still requires a batting and a bottom, and the minion mitts. It's the mitts that are finished! Hoorah!


Link to my Ravelry project page - HERE
Link to the original blog with original tutorial - TampaBayCrochet - HERE

Hope you like them! x

Monday, July 14, 2014

Staying creative


This week, I reminded myself that I don't necessarily need hours and hours of time to make something cute and simple. 

The challenge that I have at the moment is to have time + motivation + creative mojo all at the same time. This bag however, was created without a plan. 

Off cut of upholstery fabric from ikea (from the bargain bucket) and an hour of my time. 

I didn't really measure anything either - this is for me, so I'm willing to have a bit of wonkiness. It didn't turn out wonky though! 

Little tote bag, suitable for me and my everyday needs :)

Monday, May 5, 2014

Cloudy Day - Beginners Crochet Baby Blanket

I finally finished this baby blanket!

 
TUTORIAL - on how to make a granny square
TUTORIAL - on how to join granny squares
INSPIRATION - on how I edged the blanket
(all external links are tried and trusted by me)

I started it way back in November last year, and it was always the plan that it was going to be plain blue with white clouds. In January I had finished the main blue blanket and was struggling to successfully make clouds that I liked. I tried many ways to crochet the clouds initially, and even though they ended up being correct and looking like they were meant to, I just was not happy with them. So, because of this, the blanket lost momentum and I had to put it away.

This past week, I eventually got round to thinking about this again - needing a newborn present for my new 2nd cousin Ben, it would be perfect! All that was missing was the clouds. Kicking myself up the rear, I went to a local fabric shop and bought an offcut of lovely soft fleece. Lucky that it was there as an offcut, as I knew I had to be really fussy about it. It could not fray or lose fluff at the cut edges. (a lesson I learnt the hard way recently with another fabric)

After cutting the clouds into curvy soft cartoon-y shapes. They were hand sewn on in the evenings.
Now, finsihed, freahly wahsed and ready to be packed to be sent to Ben.

I hope that you like it too! ♥

Wednesday, February 19, 2014

The start of my 3D Mosaic Flower - Part 1 of 4

I've had a project stuck in my head for what seems like ages now. At least 6 months I'd say. Inspired by this "PIN" on pinterest [follow me here] I saw this amazing 3D mosaic flower that was truly inspiring. Inspiring so much so that I had to make something 3D and mosaic, (jump in to the deep end why not?!) Previously mosaic projects had never really inspired me. I'd never really looked at mosaic projects and thought "Yeah I wanna have a go" but this one got me daydreaming about making one of my own.

The mosaic experience I have is watching the husbeast tile the mosaic backsplash in the kitchen, or I'm sure I must have done it as an activity as a child, but I cannot think if I have done so or not! So - trust me, I'm no expert!

I'd imagine you learn to mosaic by doing nice flat things - trays and mirror frames, I have even thought about starting on a more simple project like that before attempting the flower to get used to working with the putty and playing with mosaic tiles - pfft, I dont know if I can be bothered with that! I just wanna get stuck in, learn by doing (learn by making a million mistakes - probably) and not starting with those simple projects - afterall - the 3D sculpture part of it is what has drawn me like a moth to a flame.

Hmmm ... Supplies ... Well, I haven't yet got everything - but I have enough to START.
• Alu-mesh (I got it from the DIY store about 4 months ago!)
• Plaster of Paris (Bought from Ebay about 6 months ago!)

So, husbeast went out to the pub last night - and once the baby was in bed, I went down to the hobby room, whilst watching a few of my favourite programs made a start on building the mesh.

I'm thinking tulip ... so, I cut out large petal shapes from my alu-mesh. Free-hand cutting.


I then attached them together by using craft wire. I used the wire as you would needle and thread, weaving in and out making look like a sewn seam. It does not have to be neat, it will be covered eventually.


Note: once you've cut the mesh - my god it can get prickly! Scratches, pricks, prods and pokes - I think I should have attempted it wearing long sleeves because my arms were itchy from all the contact with the cut edges, luckily no blood! Afterwards, I soothed my arms after I'd finished by putting antiseptic cream on! - so next time I do this, I'll be working with long sleeves for this part for sure!

 
I also added a mesh base, attached with the craft wire - and it started to look like princess lillifee's crown rather than the bulbus tulip shape that I want. So with more wire, I pinched the petals a little further up ...

 
Looking much better! I wish I could take better photographs of this stuff. It's a nightmare!

Next step will be to cast it in the plaster - the messy bit! I'm not a big fan of playing with messy sloppy stuff ... but it has to be done! I'm looking forward to having it cast into it's shape.

So, to be continued SOON! I'll probably find the time one evening this week to continue :)

Sunday, December 8, 2013

What a busy time of year ...

Counting down 'til Christmas ...

Lots of presents made ...

Blanket for my Nephew ... (you saw this in progress a few months ago, it's been finished for a while now)

 
Infinity Scarf for my husbands Auntie (So she's my Auntie too!) ...


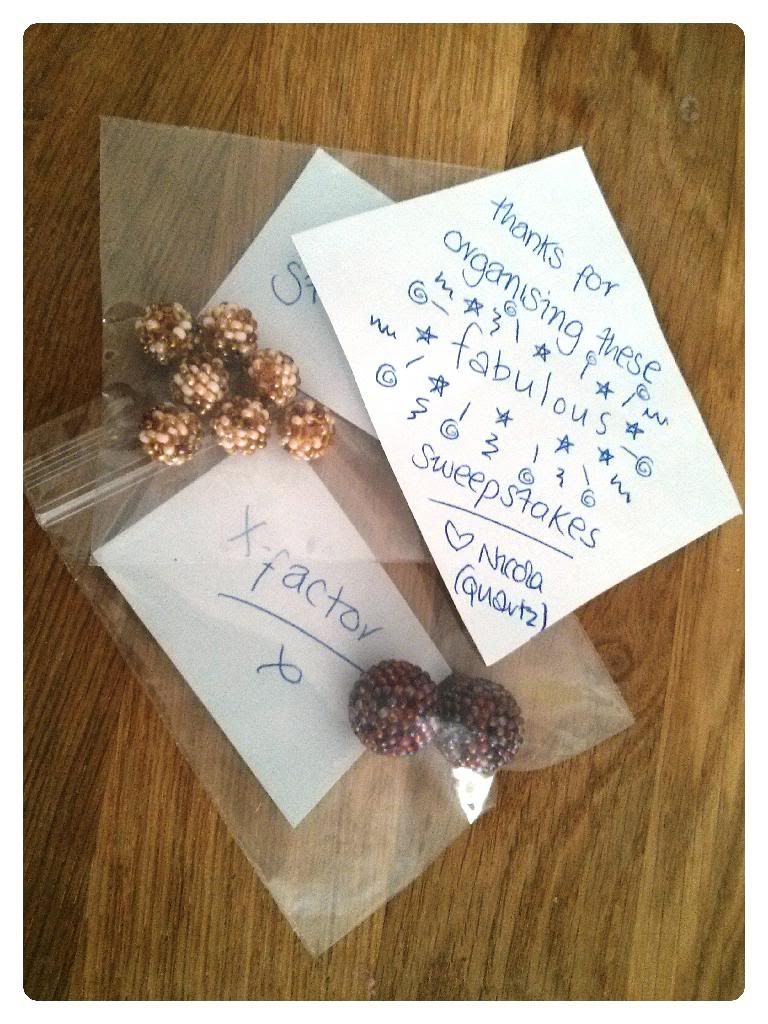
Beaded Beads for Sweepstakes that I am in ...

I also have two secret Santas finished! but it's not right for me to show you those at the moment, just in case the recipients visit my blog.

I wish that I had made more, but time has flown.
I still have some collage photo frames to do of my son for both sets of Grandparents, as well as do some pictures for the Aunties and Uncles. That is my mission for this week.

Love to you all
x

Saturday, October 19, 2013

Blogtoberfest Day #19 - Guilty purchase... ooh look what i have!

In my local craft shop... I found some real leather offcuts! Maybe I'm starting to channel work, I used to touch leather every day but obviously for the past year I've been on maternity leave so have not seen leather offcuts or hides for a good while!
For 0.5kg they are a reasonable price and I think I'll use them to make some keyrings or include in some jewellery.
I also treated myself to a leather punch too... I'm getting lots of ideas! Too many ideas and not enough time to make them all!
What would you make?

Friday, October 18, 2013

Blogtoberfest Day #18 - Sunny autumn

I met up with a friend today in Tübingen. It's such a beautiful town. Full of cobbled streets and old beautiful buildings. The weather was absolutely glorious as well. Not cold at all, perfect autumn day.
We had our babies with us and strolled round the town, did a bit of shopping, had lunch and ice cream in the park.
My maternity leave is fast coming to an end. I'll miss days like this!

Thursday, October 17, 2013

Blogtoberfest Day #17 - Preparing for Stitch 'n' Bitch

I go to a monthly meet up ... "Stitch n Bitch" which is organised by the International Womens Club (Stuttgart). I initially joined the club because I was interested in the playgroups for Zach. Once I became a member and realised that they also did a stitch and bitch I was overjoyed!

Since joining I try and go to every one.
They are always hosted at different members houses, this month it's at my house.
It's a shame the new couch will arrive 2 days later! *tsk!*

I've just had a look to see if it's going to be busy, looks like minimum 8 people!
Everyone always brings a dish to share, so there's always too much food. As host, I'll need to sort out the drinks and decided on a dish to make too.

And, maybe most importantly, what craft to do?
Should I stick with my Star afghan? Or maybe get my beads out.

Decisions decisions!

I am thinking maybe to offer showing people how to make a necklace if they fancy it.
Normally people are happy to bring and work on their things, but I have so many beads and years of experience, it could be nice to offer. :)

What do you think?

Blogtoberfest Day #16 - A few of my favourite places on the web

I spend so much time on the web, far too much infact!
Well, I can't help it if there are nice places to be. I enjoy being on a few forums and enjoy sharing interests especially when it comes to crafting.

Here are a few shout outs! Maybe you'll fancy them too!

Craft Pimp - www.craftpimp.co.uk
A place home from home! These gals are loud, fun and also very very talented!

Crafter...oo! - www.crafteroo.co.uk
lovely place to be, relatively quiet at the moment, but lovely genuine people (also very talented!)

Bead Buddies - www.beadbuddies.co.uk/forum
If you're addicted to beads and jewellery making, this is a great place! I've been a member of this place for YEARS, and I'll stay there forever!

Hope to see you there!
x

Wednesday, October 16, 2013

Blogtoberfest Day #15 - Fish and chips night!

Well what a pleasant evening I've had!

Since it's midweek, we invited round some friends to watch the football world cup qualifier (England v. Poland)

And we offered to do a fish and chips night!
Being British and living abroad, it's one of those things we had to learn how to make it for ourselves!

7 of us altogether!

Great night!

Monday, October 14, 2013

Blogtoberfest Day #14 - still going strong

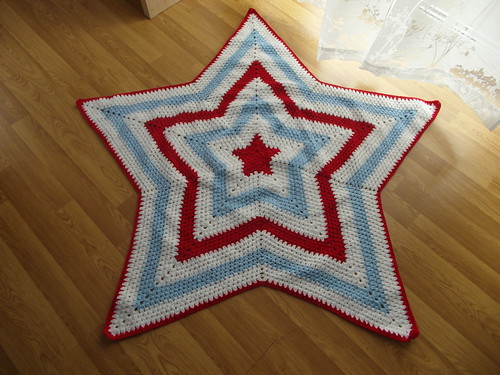
I'm still going strong on the granny star Afghan. I'm wanting always to start other crochet projects, but I'm determined to finish this before I move on otherwise it'll never get finished.

It's reached an acceptable size now for a baby, but since this is going to be for a two year old. I want it to be much bigger. How much bigger is the question.

I'm just going to keep on going I think.
Maybe so it has 3 sections of red, 3 sections of blue... And however many white that'll mean too. Probably with a little edging too. Can't you tell that I'm not really planning this? I'm just going with the flow until it looks right!

I'm already through the white will that I had bought, need to get some more tomorrow. I am probably going to need more blue and red too but it's all guesswork from me on how much exactly, I may just get one at a time and then make multiple trips back to the store if necessary. It's a bit extreme, but I really do want to avoid building a big stash of wool.

My quota per day is to get done one block of colour (4 rows) but of course, since it's getting bigger and bigger this is getting harder to achieve. I will continue to try though.

On a happy note... I am happy with how my crochet is turning out. Each stitch is nice and neat and the tension is good too. So nice to have improved so much within 2 projects! At the beginning it was even a challenge to hold the wool to get a good tension.

I think even now I could make more things and give them to more people as presents too and be proud of what I make!

How would you make it for a 2 year old?

Sunday, October 13, 2013

Blogtoberfest Day #13 - My Christmas Wishlist

I've been window shopping on Etsy this evening!
Oh man there is some wonderful stuff on there.

I'm so glad that they have started doing Etsy vouchers in GBP.
This means I'll be able to put Etsy vouchers on my Christmas list!

But ... here are a few of my Christmas wishes :)
(Just in case the hubster decided to pop along to my blog, I will tweet the link and hopefully he'll get the hint! ha!)

I so love to craft... so some things like these are on my wishlist!

Because I love clouds
 
Because I adore kingfisher colours
 
Because I'm a bead addict
 
Because I'm a Fat Kitty Fan
 
Because I adore handmade silversmithing
 

Saturday, October 12, 2013

Blogtoberfest Day #12 - yummy scrummy chocci biscuits

Mmmh! I love baking... The only issue is that when baking, you've got to eat it! (Which is not good for the waist line!) So I only try and bake when I know I will be meeting up with friends the same day or following day. In this case I'll be meeting friends tomorrow, so I decided to brake this evening after cheeks (aka Zach) was in bed!

Introducing yummy scrummy chocci biscuits.

What you'll need
• 100g dark chocolate (Minimum 55%)
• 100g unsalted butter
• 150g brown sugar
• 1 egg
• 1 tsp vanilla essence
• 175g self raising flour

Put a heatproof bowl over a pan of simmering water. Melt the chocolate slowly until smooth.

Add butter and allow to melt into the chocolate.

Remove bowl from pan and stir in the sugar.

Leave to cool for 3-5 mins

In a separate jug, whisk the egg and add the vanilla essence. Then stir this into the chocolate mix.

Them mix the flour into the chocolate mix thoroughly.

Once well mixed, cover the bowl with cling film (plastic wrap) and leave to chill on the fridge for at least 45 mins.

When ready - preheat the oven to 200°C/400°F/gas 6

Cover a baking tray with baking sheets.

Divide the dough into equal little neat balls and put on the tray well spaced. (The biscuits will spread in the oven)

Bake for 10 minutes,
Remove from oven
Allow to cool on a cooling rack

Enjoy 10 minutes later when the biscuits have firmed up a little!

Enjoy!


Friday, October 11, 2013

Blogtoberfest Day #11 - oh poop!

I made a mistake on the star blanket... Like 3 rows back... It was in one if those places where it would be so noticeable and could jeopardise the star shape! It had to be unpicked.

I'm now in the process of redoing all my days work on it.

How frustrating!

Thursday, October 10, 2013

Blogtoberfest Day #10 - A glamorous life!

Well, no not really!
Even though I've been very productive and creative over the past week, today has not been anything near creative!

My little man (9 months old) has had a husky cough and a runny nose over the past few days, and it's just not going! So today I decided to have a day in the house, keep him warm and happy. Bless him, he's feeling so sorry for himself. In the minutes that he forgets about his runny nose, he's a happy chappy and I've been trying to keep him entertained and giving lots of cuddles. We've even had snoozes together on the couch this afternoon!

I have managed to do a few more rows on the granny star project, and I'm happier with the blue now it's in there. Looks like I was worrying for nothing. I'll see if they like it on Christmas day when the present is opened :) (will have to keep my fingers crossed on that one!) I don't know yet how big it needs to be, of I have enough wool to complete it or anything! I'll just keep on going until it looks right, and if that means another trip to the store then so be it!

So, sorry for the yawn-post!
Not much going on here today and I hope there will be more to report soon!

Take care!
x

Wednesday, October 9, 2013

Blogtoberfest Day #9 - There's never just one right answer ...


Don't you think?
When it comes to creativity and definite colour combinations, so many can be right - so which one is the correct one?!

I knew that my next crochet project would start asap, I had such a good time making the blanket, that I wanted to get started on making a star afghan blanket for another Christmas present. This time for my 2 year old nephew. He can use it as a rug, a rag, playmat, something to snuggle in - whatever! One thing I knew is that it had to be a cool shape, and since I'm getting good at granny squares, after a search on Ravelry, I found a free GRANNY STAR blanket pattern! Perfect :)

I asked my sister-in-law what colour his bedroom is - light blue and red, with a hint of lime green.
Wow, what a colour combo. I had thought that red, white, light blue and mid blue would be great, and I'd drop the green.

When I went shopping though - I stuck with the same yarn type as I had for my previous project - and they didn't have a mid blue - they had a royal blue, which was too strong, and a navy blue - which was cool, but I really wanted light blue and I think it was also too strong. One or the other, so I stuck with the light blue.


Well, then - once I got them home - I had doubts.
Had I picked the right colours? Such a bold red and a pastel soft blue?
Should I have got the navy instead?

So many possibilities, none of them are necessarily wrong.
I went to my experts (The craft pimp forum - click here for the colour discussion), and everyone had fab ideas! All of them liked the colour combo already - but there were suggestions on adding an extra darker blue in and some not!

I decided really to be reasonable with myself and not just run out and buy more wool, but to start the pale blue and see what it was like in the piece before making any decisions!


Do you come into troubles like this? When there's no definite correct answer, everything is right but which is the best? Tell me I'm not alone!